
The old carpet lying beneath your feet might hold stories, but it also traps years of dust, allergens, and odors that quietly dull your home’s atmosphere. Replacing or removing carpet isn’t just about upgrading a room, it’s about starting fresh, giving your floors the space to breathe again. Whether you’re preparing for new flooring or clearing space for renovation, understanding the process can save time, energy, and unnecessary frustration. This guide breaks down the art and effort behind proper carpet removal, drawing from real-life experience in the junk hauling and debris removal industry. From cutting and rolling techniques to responsible disposal methods, every detail matters. Carpet removal may seem simple, but without the right approach, it can quickly become a chaotic mess of fibers, staples, and back-breaking work.
Preparing Your Space for Carpet Removal
Before any cutting begins, preparation is everything. The space must be cleared entirely—furniture, decor, and even small items that could obstruct movement. It’s easy to underestimate how much room you’ll need once rolls of carpet start stacking up. A clean, open floor allows for smoother work and helps you see the full scope of the task ahead. Cover vents, seal off adjacent rooms, and wear protective gear to prevent dust from spreading or irritating your lungs. Preparation creates order before the chaos. Once the area is clear, take note of seams, transitions, and tacked edges. These will guide your removal path. Some homeowners prefer to photograph the layout before removal, a small trick that helps later when reinstalling baseboards or dealing with subfloor repairs. The pre-removal phase is like stretching before a marathon.
The Right Tools for the Job
A carpet knife might look like a simple utility blade, but it’s your best ally in this job. Sharpness is key; a dull blade tears the carpet unevenly and makes your arms ache twice as fast. Alongside it, a sturdy pry bar helps release tack strips without splintering the floor. Don’t forget gloves with a good grip and knee pads small details that protect against carpet burn and fatigue. For larger rooms, a carpet puller can make all the difference, gripping and rolling heavy sections without straining your back. It’s also wise to have trash bags ready for padding and debris, plus duct tape to secure carpet rolls. These rolls can get unwieldy fast, so tape helps maintain control and prevents fibers from shedding everywhere. Finally, a pair of pliers for stubborn staples and a shop vacuum for final cleanup complete your toolkit. The right tools aren’t about luxury—they’re about efficiency, safety, and momentum. With each tool chosen well, you trade frustration for focus.
Cutting the Carpet into Manageable Sections
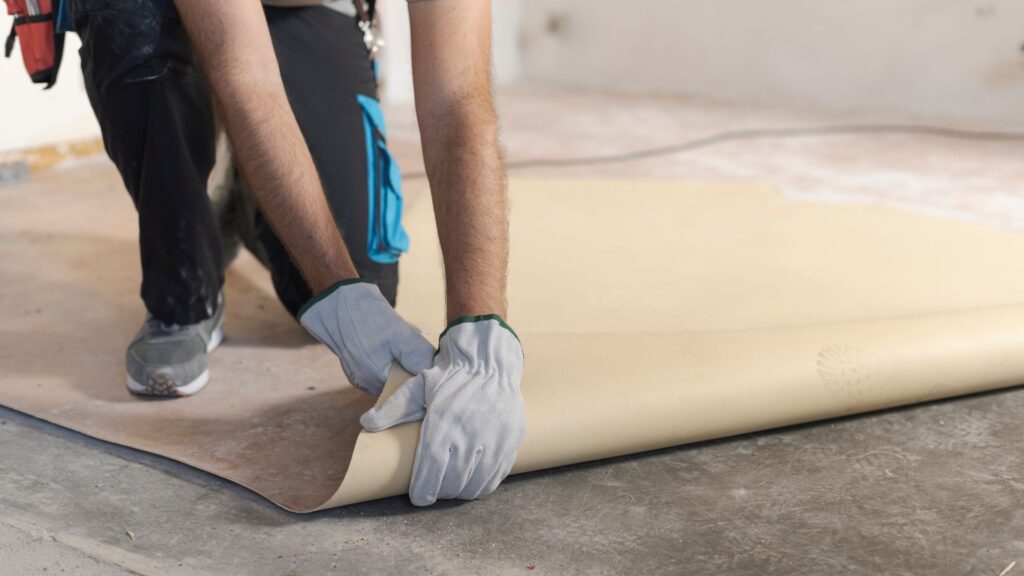
Most carpets come up easier when cut into smaller, manageable sections. Trying to remove an entire room in one pull might look heroic, but it’s also exhausting and inefficient. Begin cutting strips about three feet wide, following the natural seams or direction of the weave. These strips roll neatly and fit into standard disposal containers without a struggle. Working in small sections lets you control the process and pace, especially when dealing with heavy padding underneath. Each strip should be rolled tightly and secured with tape as you go. This prevents clutter from spreading and keeps the workspace clean. As you move across the room, you’ll notice how light begins to change and the floor breathes again. There’s something satisfying about seeing progress marked by neat rows of rolled carpet.
Handling Carpet Padding and Adhesive Residue
The padding beneath the carpet can be deceiving. It looks soft, but removing it often reveals the real challenge: stubborn adhesive, discolored stains, and occasionally mildew. Start by peeling back the padding, cutting it into sections just as you did with the carpet. Some padding may be stapled to the subfloor, so a scraper or pry bar comes in handy. Be gentle with wood floors; excessive force can cause scratches or splintering. Once the padding is gone, assess what’s left behind. Adhesive residue may require a solvent or a floor scraper. A mix of warm water and mild detergent can soften glue spots for easier removal. It’s a slow process but crucial if you plan to refinish or install new flooring. Think of it as clearing away the last traces of what once was. Every layer you lift brings you closer to renewing a floor ready for something new to rest upon.
Removing Tack Strips and Staples
Tack strips line the edges of most rooms, securing the carpet tightly in place. They’re sharp, thin, and often splintered with nails that bite back if you’re careless. Use a pry bar and hammer to lift them carefully, working at an angle to avoid damaging the floor beneath. Dispose of them cautiously; their pointed ends can pierce through trash bags if not wrapped or taped. After the tack strips, turn attention to the staples scattered across the floor. Each one represents a potential hazard, tiny but mighty. Needle-nose pliers can pull them out efficiently, and a magnet sweeper can help find any missed ones hiding in corners. While tedious, this final cleanup ensures your surface is truly ready for what comes next. It’s the unseen details that elevate a job from done to well done.
Cleaning and Inspecting the Subfloor
Beneath the carpet lies the truth of your floor’s condition. Years of moisture, dust, and foot traffic can leave marked stains, warping, or even minor rot. Once the surface is clear, vacuum thoroughly to remove loose debris. Then inspect closely for discoloration, creaks, or uneven patches. Addressing these issues now prevents bigger headaches later. A fresh carpet or new flooring will only be as strong as what lies below it. For wooden subfloors, tightening loose nails and sanding rough spots can restore a level surface. Concrete floors may need patching or sealing. Use a disinfectant to neutralize lingering odors or mildew from past spills. Taking this step gives your new floor a stable foundation, both structurally and aesthetically.
Disposing of Old Carpet Responsibly
Once everything’s rolled, bagged, and taped, the next question is what to do with it all. Carpet disposal isn’t as simple as leaving it at the curb; many local waste services won’t accept it due to size and material type. Some carpet fibers can be recycled, especially nylon and polyester blends, but they need to be dropped off at designated recycling facilities. Check your city’s waste management site for carpet recycling programs or drop-off locations. If recycling isn’t an option, professional junk removal services can simplify the process. They handle transportation, sorting, and responsible disposal while saving you time and back strain. What’s important is keeping as much material out of landfills as possible.
Hiring Professionals for Carpet Removal
While DIY removal is doable, professional services offer speed, efficiency, and peace of mind. Experts bring tools designed for the job, ensuring your subfloor remains intact and disposal complies with local regulations. What might take you a weekend could take them a few hours. Plus, they know how to handle bulky materials without damaging walls, stairs, or door frames in the process. Hiring a professional also eliminates the hassle of sorting and disposal. They don’t just remove carpet, they restore order. If you’re juggling renovations, work, or family obligations, this convenience can be worth every cent. Beyond saving time, it prevents the aches and accidents that come with heavy lifting and sharp tack strips.
Common Mistakes to Avoid During Carpet Removal
A few missteps can turn a straightforward removal into a frustrating mess. The first is underestimating the workload carpet is heavier and messier than it looks. Skipping protective gear or neglecting to ventilate can leave you sneezing through clouds of dust. Another common mistake is using the wrong tools, which leads to torn carpet, gouged floors, or sore muscles. Rushing without cutting into manageable sections is another classic error that leads to exhaustion. Improper disposal can also come back to bite you. Leaving rolls on the curb without checking regulations might earn you fines or missed pickups. And skipping subfloor inspection before reinstalling new flooring invites future problems like squeaks or uneven surfaces. Every shortcut in this process eventually doubles the work.
Preparing for the Next Step in Your Renovation
Once the carpet is gone, the room feels lighter like it’s exhaling for the first time in years. The cleared floor offers a blank canvas, whether you’re installing hardwood, tile, or a fresh layer of new carpet. Before moving forward, give the floor a final sweep and allow it to settle overnight. This helps identify any issues you might have missed during inspection, like minor warps or lingering dust. Plan the next step based on your timeline. If new flooring installation isn’t immediate, consider laying temporary mats to protect the surface. This also makes moving furniture easier without scratching the subfloor. T
Conclusion
Carpet removal may seem like a small part of a renovation, but it’s the foundation for every transformation that follows. Each step from preparation to disposal reveals a layer of care and precision that defines a home’s evolution. Whether you take the do-it-yourself route or call in the professionals, what matters most is the attention to detail. A clean, restored floor sets the stage for everything that comes next. For those in Los Angeles looking for expert help with carpet disposal or full-service junk removal, Dirty Deeds Junk Removal Los Angeles is the go-to team. With their reliable service and commitment to eco-friendly disposal, they handle the dirty work so you can focus on what matters—reviving your space. Reach them at +1 213-601-2778 for quick, responsible carpet removal and hauling done right.